Don’t waste all of the chicken broth! Learn how to can chicken broth so that it is ready to use in soups at a moment’s notice. You’ll never go back to store bought stock when making your own can is this easy. Grab the pressure canner and the mason jars!

The site may contain links to affiliate websites, and we receive an affiliate commission for any purchases made by you on the affiliate website using such links. As an Amazon Associate I earn from qualifying purchases. As a Revive EO Affiliate I earn from qualifying purchases.
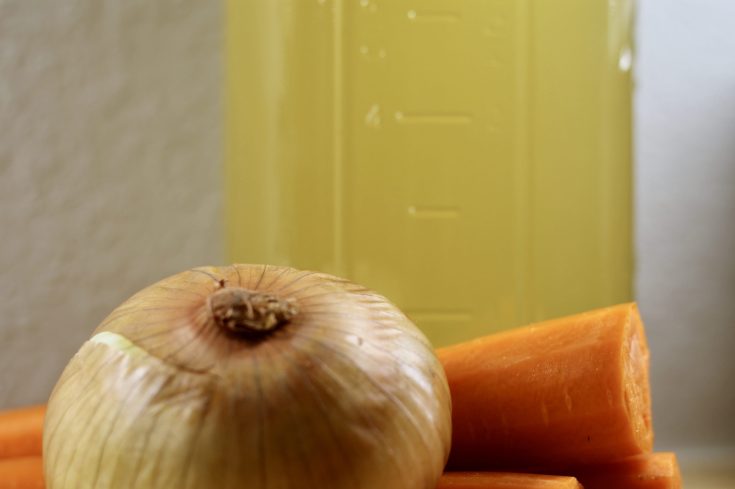
So Much Chicken Broth
I save all of our bones, skin, innards, and vegetable scraps to use when I make bone broth in the Instant Pot. It is so simple to make. I can set it and forget it. Then I’ll freeze it in quart sized bags. This system has worked just fine, except that our freezer is bursting with broth. Especially in the summer when we are consuming less of it. After the freezer door didn’t shut tight one evening, I found melted chicken broth all over the freezer and floor. Unfortunately the bags sometimes spring a leak. That’s when I decided to learn how to can chicken broth because jars don’t leak.
Pin it for Later!

Health Benefits of Chicken Broth
Growing up, I was always told that I needed to eat something brothy when I was sick. Chicken noodle soup was a standard sick food around the house. Although I thought it was all nonsense as a kid, now I understand why broth was such an important sick food. In fact, now I enjoy it when I’m healthy too.
- Amino Acids, Vitamins, & MInerals : When the bones and cartilage are boiled the collagen is broken down. This releases amino acids that are good for you. The most prevalent of which is gelatine. The bones also release calcium, phosphorus, magnesium, and trace minerals.
- Promotes Digestion: The gelatine and other amino acids help the food move through your intestines. They team up with the water in the foods to get things moving.
- Immune Support: Much of our immune system is in our gut. The amino acids can protect against leaky gut, which means the bad stuff keeps on going towards the exit instead of back into your body. Plus the amino acids give your body what it needs to keep you healthy.
- Young & Skinny: Although the collagen breaks down into amino acids when cooked, the amino acids help the body produce collagen when consumed. Which means the fountain of youth should be spewing bone broth. It has also been shown to help with weight loss
- Feel Young: The collagen from chicken bones not only keeps you looking young, but it also makes you feel it too. It can help with osteoarthritis pain and stiffness and other orthopedic injuries.
- Sleep Better & Think Better : Glycine is another amino acid found in bone broth. Glycine promotes a good night’s sleep. It helps the body lower its temperature in preparation for sleep and regulate its internal clock. Possibly why I always fall asleep after eating my favorite soups. It has also been shown to help memory and mental functioning. When you’re not asleep after eating it of course.
How to Can Chicken Broth
Ingredients
Chicken Broth (check out my recipe if you need directions to make it)
Vinegar
Instructions
- There is some debate about skimming the fat off of the bone broth. If you plan to use it within 6 months then I wouldn’t worry. There is a possibility that it may go rancid and ruin the jar of broth. To make it easy to skim off the fat, let the broth sit in the fridge overnight. The fat will solidify at the top and be easy to remove.
- Next pour the broth into a pot to boil while you get the jars and pressure canner ready. Put the jars in a sink of hot water. Fill the pressure canner with water and start heating it up.
- Then it’s time to fill the hot jars with hot broth. Use a canning funnel and ladle to fill up the jars. Leave 1 inch of headspace.
- Wipe the rim of the jar with a clean cloth dipped in vinegar. This will help make sure you get a good seal. There should be no chips, cracks, or broth.
- Put a new lid on the jar. Then put on the ring and screw it down until it’s fingertip tight. Place the jar in the pressure canner.
- This step can vary based upon what pressure canner you’re using, so please check the manufacturer’s directions. Seal the pressure canner and let it come to a boil. Let it release a constant stream of steam for 10 minutes before weighting it or adding the rocker.
- Place the rocker or weighted gauge on the pressure canner at 10 pounds of pressure if you’re using a weighted gauge. For a dial gauge it’s 11 pounds of pressure. Make sure to adjust this based on your elevation. The manufacturer’s directions will be able to guide you on that.
- Once it has reached pressure you’ll need to let pint jars process for 20 minutes. Quart jars will take 25 minutes. Then turn off the heat and let the pressure come down to zero on its own. Let the jars sit for 10 more minutes inside the canner before opening the lid.
- Use a jar lifter to move the jars onto a towel where they can sit overnight. They need to be left alone during this time. Once they are cooled remove the rings and add a label.

How to Use Canned Chicken Broth
This simple Crock Pot recipe is one of my go to meals in the cooler months. I can set it when I get home from work, the food is ready and the house smells amazing.
My mom always made this soup for me because it was my favorite meal. It is a labor of love especially with homemade noodles and smashed potatoes, but it’s perfect on a cold winter evening.
Rice and Noodles
Did you know that you can boil rice and noodles in bone broth? It gives them a nutritional boost over regular water. Often I’ll mix water and broth together when cooking them. Plus it gives the taste a little boost.
Refried Beans
I discovered that making my own beans for taco night is actually not that hard with an Instant Pot. I’ll use broth in the beans to help get all of those good benefits I mentioned above. They’re so much better than store bought.
How to Can Chicken Broth
Ingredients
- Chicken Broth
- Vinegar
Instructions
- There is some debate about skimming the fat off of the bone broth. If you plan to use it within 6 months then I wouldn’t worry. There is a possibility that it may go rancid and ruin the jar of broth. To make it easy to skim off the fat, let the broth sit in the fridge overnight. The fat will solidify at the top and be easy to remove.
- Next pour the broth into a pot to boil while you get the jars and pressure canner ready. Put the jars in a sink of hot water. Fill the pressure canner with water and start heating it up.
- Then it’s time to fill the hot jars with hot broth. Use a canning funnel and ladle to fill up the jars. Leave 1 inch of headspace.
- Wipe the rim of the jar with a clean cloth dipped in vinegar. This will help make sure you get a good seal. There should be no chips, cracks, or broth.
- Put a new lid on the jar. Then put on the ring and screw it down until it’s fingertip tight. Place the jar in the pressure canner.
- This step can vary based upon what pressure canner you’re using, so please check the manufacturer's directions. Seal the pressure canner and let it come to a boil. Let it release a constant stream of steam for 10 minutes before weighting it or adding the rocker.
- Place the rocker or weighted gauge on the pressure canner at 10 pounds of pressure if you’re using a weighted gauge. For a dial gauge it’s 11 pounds of pressure. Make sure to adjust this based on your elevation. The manufacturer’s directions will be able to guide you on that.
- Once it has reached pressure you’ll need to let pint jars process for 20 minutes. Quart jars will take 25 minutes. Then turn off the heat and let the pressure come down to zero on its own. Let the jars sit for 10 more minutes inside the canner before opening the lid.
- Use a jar lifter to move the jars onto a towel where they can sit overnight. They need to be left alone during this time. Once they are cooled remove the rings and add a label.
The site may contain links to affiliate websites, and we receive an affiliate commission for any purchases made by you on the affiliate website using such links. As an Amazon Associate I earn from qualifying purchases. As a Revive EO Affiliate I earn from qualifying purchases.
Leave a Reply